Privacy Screens Manual Assembly
Introducing the assembly manual for the VC METAL DECOR Privacy Screen. This manual demonstrates the installation of VC METAL DECOR Screens using Mounting Posts on a wood or composite deck surface.
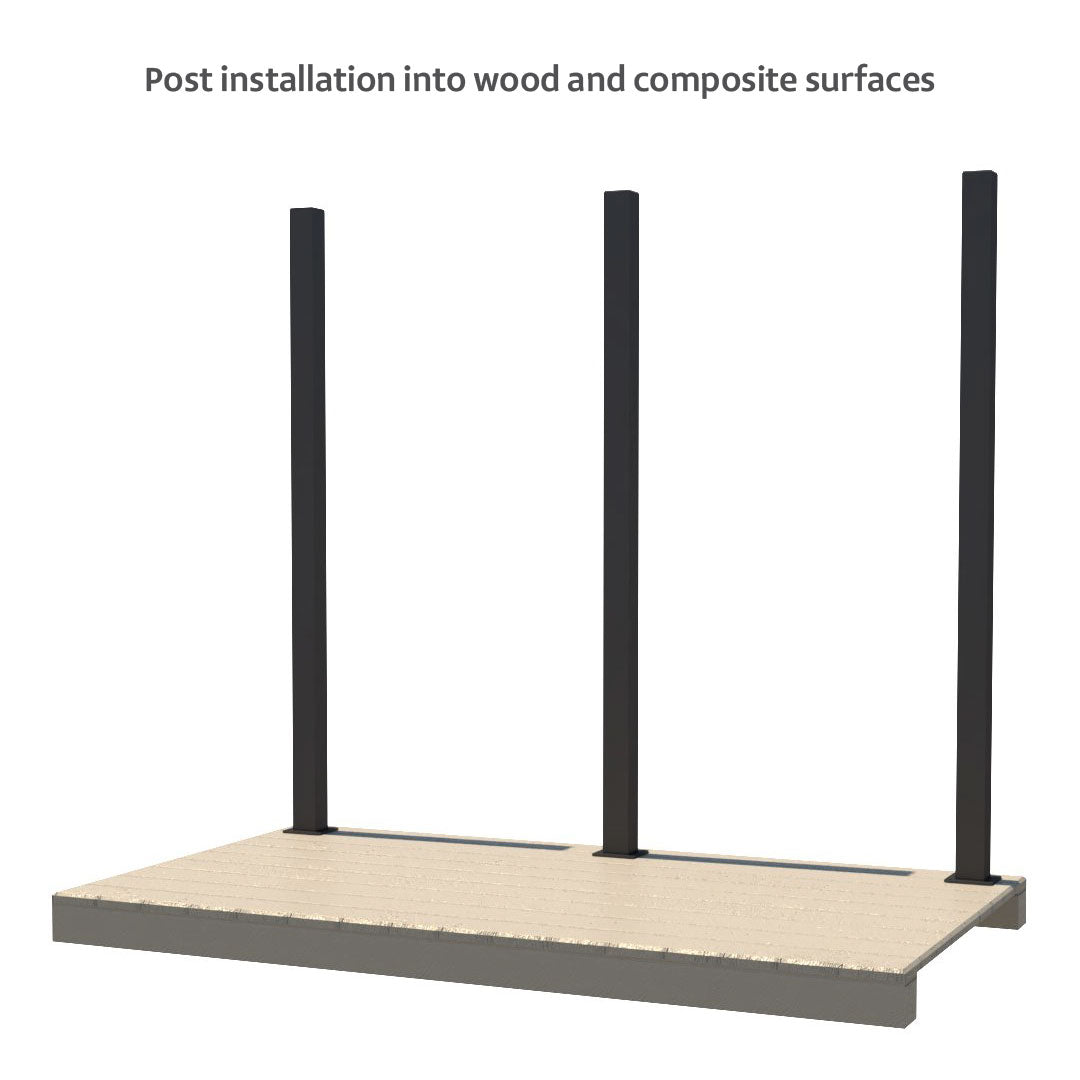
Post Installation into Wood and Composite Surfaces
-

1ST STEP: Place the Posts
Position the posts in your preferred spots and measure the gap between them to ensure they are precisely 3 feet and 1/16 inch apart. Ensure adequate backing is in place for stability and safety.
-

2ND STEP: Fasten the Posts
Once you've verified your measurements, secure the posts by inserting GRK Structural Screws through the pre-drilled holes on the base plate into your deck surface.
-

3RD STEP: Secure the Base
The lag bolts are available separately. Select the suitable anchoring bolts according to your specific application requirements.
-

4TH STEP: Secure the Posts
Double Check your installation with a level on both side of the post. Fully fasten, and secure the posts.
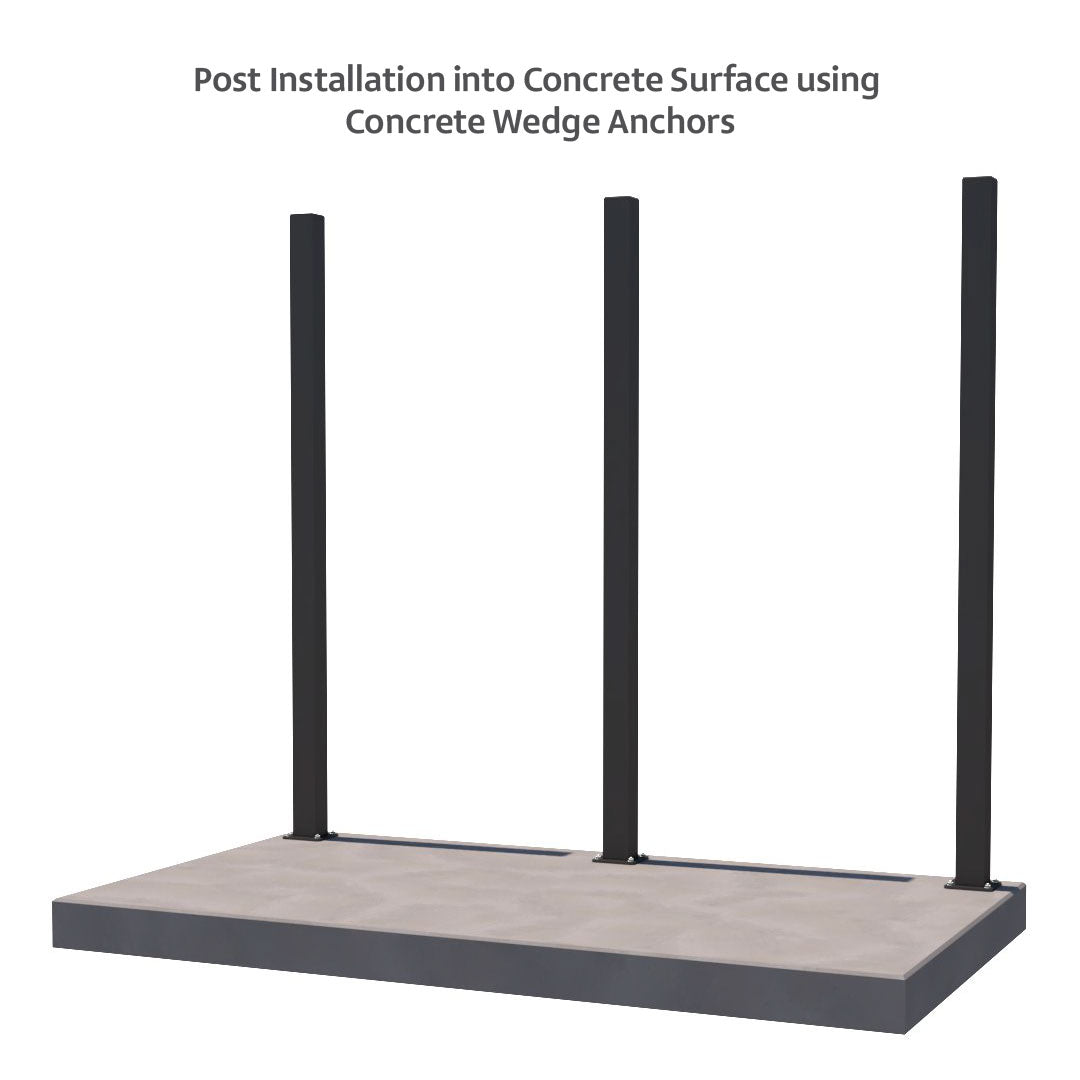
Post Installation into Concrete Surface
-

1ST STEP: Place the Posts
These instructions outline how to install the VC METAL DECOR Posts on a concrete deck or patio. Please consult the Installation options provided to determine the correct spacing between the posts.
-

2ND STEP: Fasten the Posts
After confirming your measurements, mark baseplate holes on concrete and drill holes in accordance to wedge anchor specifications. Ensure your holes are precise as incorrect placement can cause mounting issues.
-

3RD STEP: Place the Wedge Anchors
After drilling the holes, insert the wedge anchors and hammer them firmly into position.
-

4TH STEP: Secure the Posts
Fasten and secure the post to the concrete. Double check your installation with a level on both side of the post. Refer to the respective screen installation tutorial for remainder of the assembly.
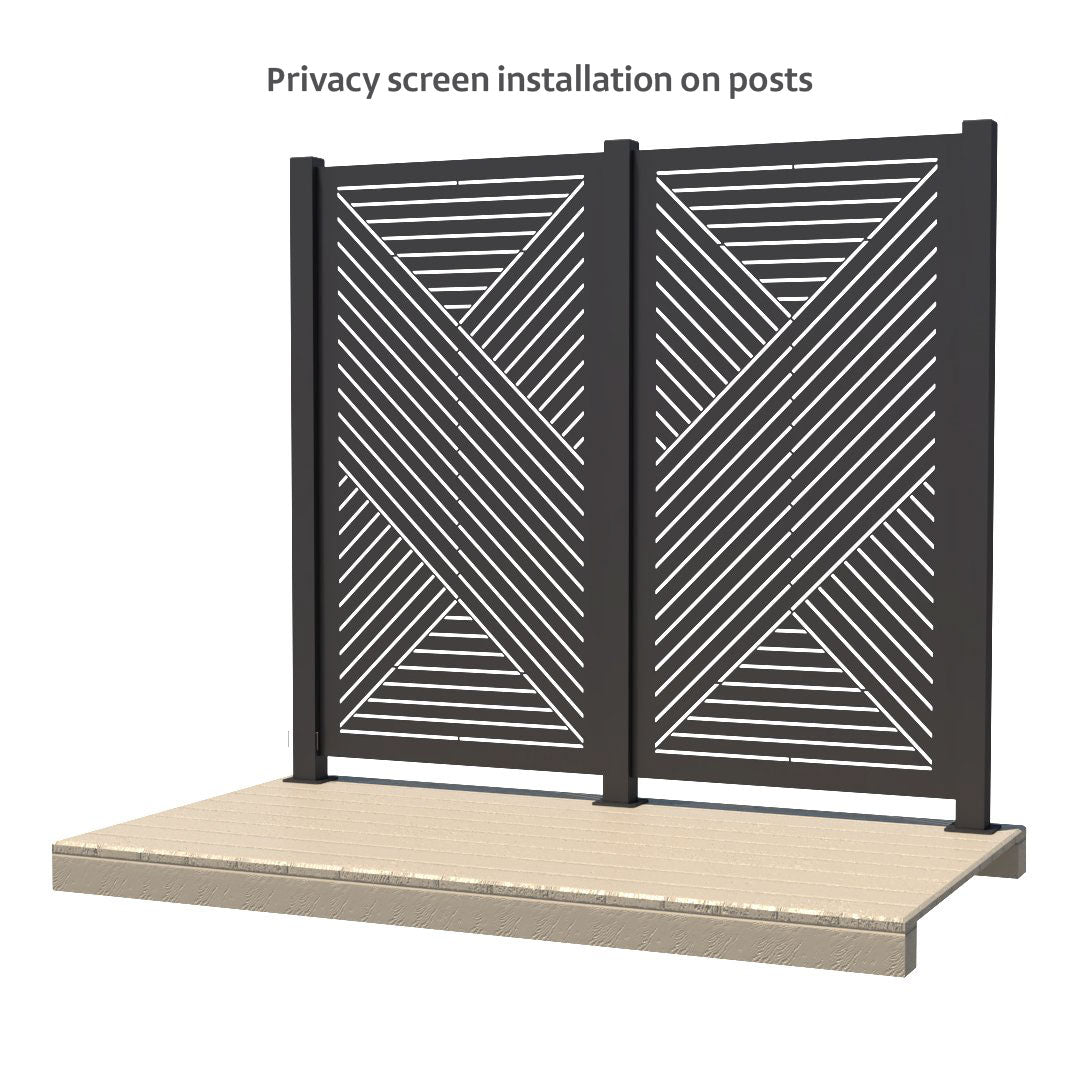
Privacy Sreen Installation on Metal Posts
Place the Screens between the Posts
Start Step Two by positioning the privacy screen so that the face of the "L" aligns with the centerline of the post. Then, measure the height of the screen according to your preference
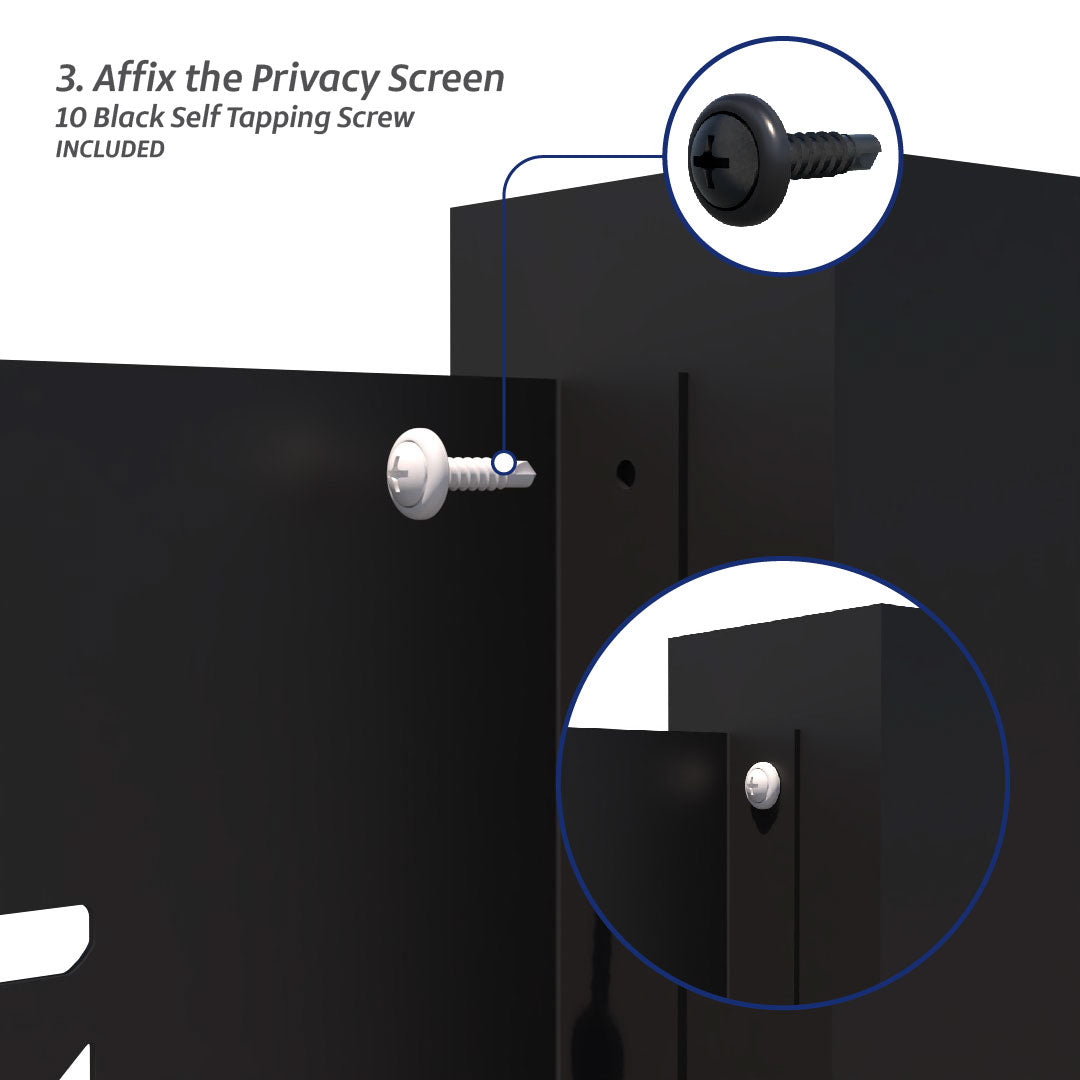
3RD STEP: Affix the Privacy Screen
Make sure the "L" side is oriented with the flat face towards the inside and the privacy screen facing outward. Place the privacy screen inside the post, precisely centered. Secure the mounting bracket to the post using the provided self-tapping screws.
4TH STEP: Affix the Privacy Screen
Make sure the "L" side is oriented with the flat face towards the inside and the privacy screen facing outward. Place the privacy screen inside the post, precisely centered. Secure the mounting bracket to the post using the provided self-tapping screws.
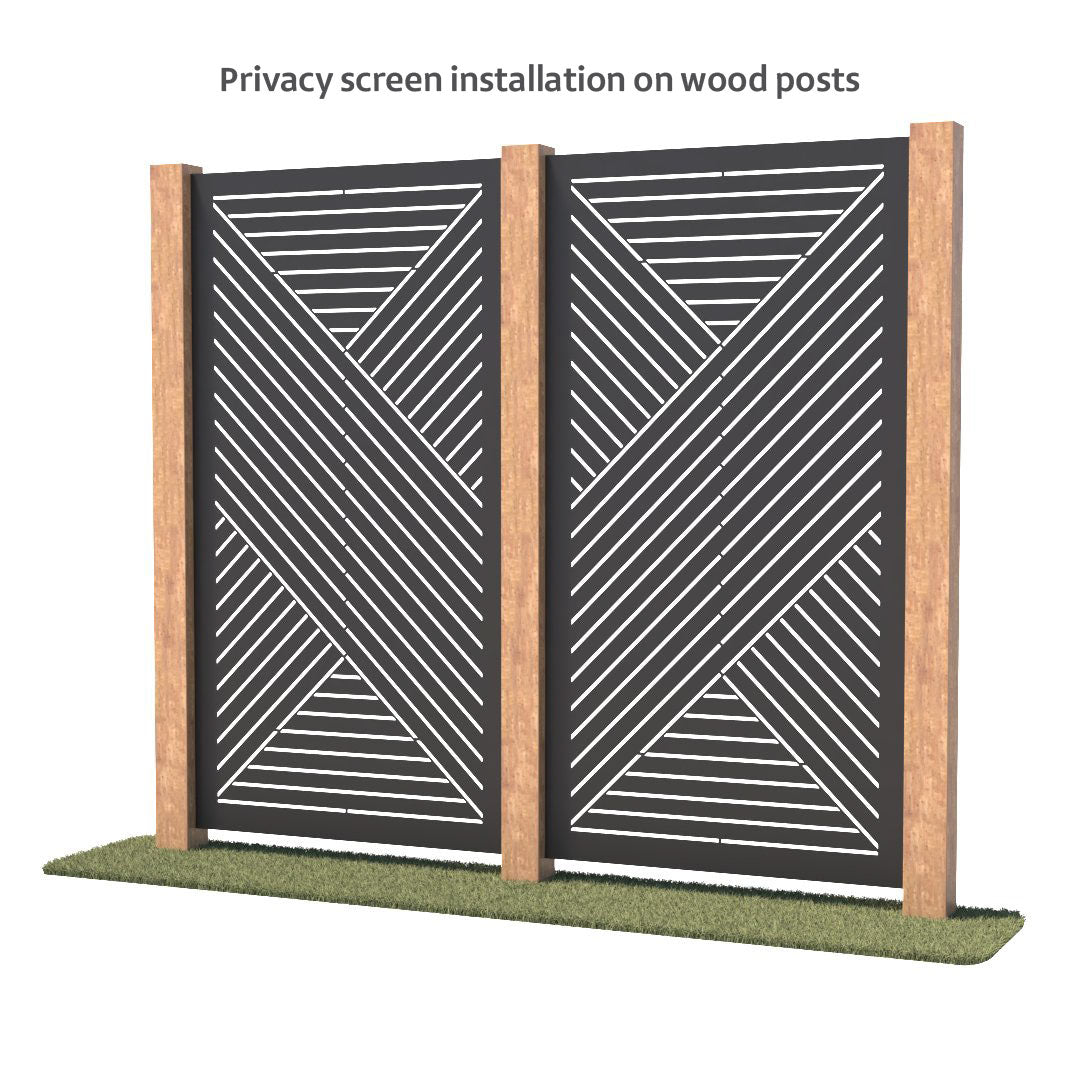
Privacy Screen Installation on Wood Posts
-

2ND STEP: Place the Screens between the posts
Start positioning the privacy screen so that the face of the "L" aligns with the centerline of the wood post. Then, measure the height of the screen according to your preference.
-

3RD STEP: Affix the Privacy Screen
Flat head wood screw #8 x 3/4" (no included)
Do you have any questions about the installation process?
Don't worry! Our technical support is here to help! We have a team ready to assist you with anything you need. Get in touch with us and we'd be happy to answer your questions or comments.


